Introduction
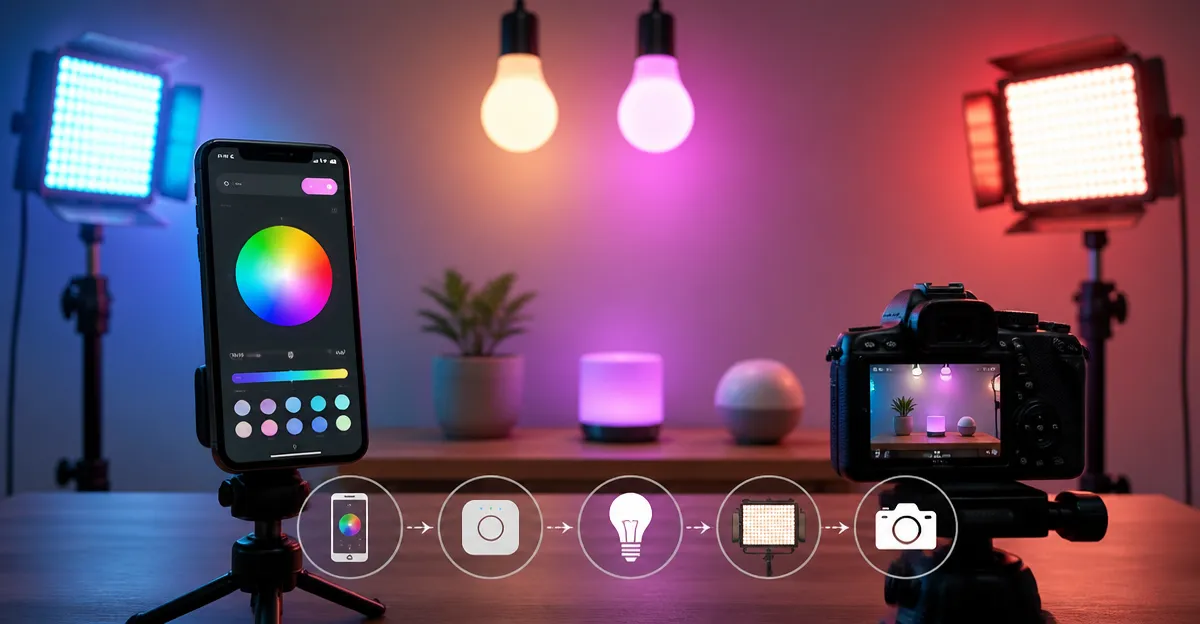
This guide explains how to synchronize smartphone LED panels with a Philips Hue lighting system to achieve uniform illumination for photographic and video productions. Readers will discover the technical steps required, the advantages of integrating portable LED panels, and the practical outcomes that result from precise color matching. By following the instructions, one can eliminate mismatched color temperatures and reduce post‑production correction time. The result is a seamless workflow that enhances visual quality while maintaining portability.
What You’ll Need
- Philips Hue Bridge and at least one Hue bulb or lightstrip
- Smartphone running iOS or Android
- Wi‑Fi network with stable internet access
- LED panel that can be controlled via Bluetooth or Wi‑Fi (examples are listed in the Products Mentioned section)
- Hue mobile app (free) and any companion app required by the LED panel
Step 1: Set Up the Philips Hue Bridge
Begin by connecting the Philips Hue Bridge to a router using the supplied Ethernet cable. Plug the bridge into a power outlet and wait for the three indicator lights to become solid. Open the Hue app on the smartphone, create or log into a Hue account, and follow the on‑screen prompts to detect the bridge. Once the bridge is registered, add at least one Hue bulb to the same room where the LED panel will be used. This establishes a common lighting ecosystem that can be accessed by third‑party devices.
Step 2: Choose a Portable LED Panel
Select a compact LED panel that offers adjustable color temperature and brightness, as these parameters must align with the Hue settings. The Ulanzi VL100X Selfie Light is an excellent choice because it provides 100 high‑CRI LEDs, a bi‑color range of 2500K‑6500K, and a dimmable output. Priced at $21.80 with a rating of 4.4 out of 5 stars from 691 reviews, it includes a built‑in 2000 mAh battery and multiple mounting options, allowing placement on a phone, tripod, or laptop. Its soft‑light board reduces harsh shadows, making it suitable for portrait and product photography.
The Ulanzi panel also supports Type‑C fast charging, enabling continuous operation while the device is powered. This feature is crucial when the panel must remain on for extended recording sessions. By matching the panel’s temperature range with the Hue bulbs, one can achieve a consistent lighting palette across all sources.
Step 3: Install the Panel’s Companion App
Most LED panels require a dedicated app for Bluetooth or Wi‑Fi control. Download the app recommended by the manufacturer from the App Store or Google Play. For panels that emphasize full‑color capabilities, the Zecti RGB Selfie Light offers a robust companion app that allows selection of 21 scene effects and precise hue adjustments. The Zecti panel is priced at $29.99 and holds a 4.5‑star rating from 817 reviews. Its metal hotshoe and clip provide flexible mounting, while the OLED screen displays battery level and current mode.
After installing the app, pair the LED panel with the smartphone via Bluetooth. Verify that the panel responds to brightness, color temperature, and RGB changes within the app. This step ensures that the panel can be commanded programmatically, which is required for synchronization with Hue.
Step 4: Align Color Temperature Using the Hue App
Open the Hue app and navigate to the room where the Hue bulb resides. Adjust the bulb’s color temperature to the desired value, for example 4000 K for neutral daylight. Record this temperature setting, as the LED panel must be set to the same value to avoid color casts. Using the Ulanzi VL100X Selfie Light, rotate the scroll wheel until the displayed temperature matches the Hue setting. The panel’s bi‑color LEDs allow fine‑tuned adjustments in 1‑percent increments, providing precise parity.
When the temperatures align, capture a test shot of a neutral gray card. Examine the image histogram to confirm that the white balance is consistent across both light sources. If minor discrepancies persist, use the Hue app’s “Color” slider to fine‑tune the bulb until the gray appears neutral in the camera preview.
Step 5: Synchronize Brightness Levels
Brightness synchronization is achieved by matching the luminous output of the LED panel to the Hue bulb. The Ulanzi panel reports a maximum brightness of 900 lux at 0.5 m, while a typical Hue bulb delivers around 800 lux at the same distance. Use a handheld light meter or a smartphone app that measures lux to compare the two sources. Adjust the panel’s brightness knob until the measured lux values are within 10 percent of each other.
For situations that require higher output, consider adding a second Ulanzi panel or supplementing with a larger unit such as the RaLeno 9" LED Video Light. Priced at $39.99 with a 4.5‑star rating from 2,976 reviews, the RaLeno light offers 12 W output, 600 lux at 0.5 m, and a built‑in battery that lasts up to 80 minutes. Its dual knobs for brightness and temperature allow independent fine‑tuning, making it a versatile complement to the Ulanzi panel.
Step 6: Leverage Advanced Color Control (Optional)
For creative projects that demand full‑RGB color matching, the Viltrox RGB LED Panel Light provides 360‑degree color options and Bluetooth control via the WeeyLitePro app. At $52.99 and a rating of 4.4 out of 5 stars from 67 reviews, this panel can reproduce any hue, allowing synchronization with Hue’s color scenes. Use the Viltrox app to select a Hue scene (e.g., “Sunset”) and then apply the same RGB values to the Viltrox panel. This creates a unified ambient atmosphere that extends beyond white light, ideal for music videos or themed photography.
Because the Viltrox panel uses a removable NP‑F550 battery, keep a spare battery on hand for longer shoots. The panel also includes a cold‑shoe mount, enabling attachment to a camera rig for on‑camera lighting.
Step 7: Optimize Placement and Diffusion
Position the LED panel at a 45‑degree angle to the subject to achieve soft, even illumination. Use the built‑in diffuser on the Ulanzi panel or attach an external softbox for larger subjects. For magnetic mounting flexibility, the Neewer Magnetic RGB Camera Light can be affixed to metal surfaces such as a studio rig or a tripod’s metal column. Priced at $18.69 with a 4.6‑star rating from 2,517 reviews, this light offers 61 LEDs, 97+ CRI, and 20 scene modes, providing additional fill light when needed.
When using multiple lights, ensure that each unit shares the same color temperature and brightness settings. This uniformity prevents color fringing and reduces the need for color correction in post‑production.
Tips & Pro Tips
- Calibrate your camera’s white balance manually after the lights are set; this guarantees accurate color capture.
- Use the Hue app’s “Entertainment” mode for real‑time color changes during video recordings.
- Keep firmware updated on both the Hue Bridge and the LED panel apps to benefit from the latest compatibility fixes.
- When shooting outdoors, supplement the LED panels with a portable power bank to extend battery life.
Troubleshooting
Problem: LED panel does not appear in the companion app.
Solution: Verify that Bluetooth is enabled on the smartphone and that the panel is fully charged. Restart both the smartphone and the panel, then attempt pairing again. If the issue persists, consult the manufacturer’s support page for firmware updates.
Problem: Color temperature mismatch between Hue bulb and LED panel.
Solution: Use a calibrated light meter to measure each source independently. Adjust the Hue bulb in 10‑kelvin increments and the panel using its scroll wheel until the measurements converge.
Conclusion
By following the steps outlined in this guide, one can successfully synchronize smartphone LED panels with a Philips Hue ecosystem, resulting in consistent and controllable lighting for both photo and video applications. The recommended products provide reliable performance, flexible mounting, and precise control, which together streamline the workflow and improve visual outcomes. Readers are encouraged to experiment with different configurations and to adopt the pro tips for optimal results.
Products Mentioned in This Guide
Frequently Asked Questions
What equipment is required to sync a smartphone LED panel with Philips Hue?
You need a Philips Hue Bridge with at least one Hue bulb or lightstrip, a Wi‑Fi network, a smartphone (iOS or Android), a Bluetooth/Wi‑Fi‑controlled LED panel, the Hue app, and any companion app for the panel.
How do I connect the Philips Hue Bridge to my network?
Plug the Bridge into a router via Ethernet, power it on, and wait for all three indicator lights to turn solid, indicating a successful connection.
Can I control the LED panel’s color temperature from the Hue app?
Yes, if the panel supports Hue integration or can be linked through a companion app, you can match its color temperature to Hue lights for uniform illumination.
What are the benefits of syncing smartphone LED panels with Philips Hue for video shoots?
It eliminates mismatched color temperatures, reduces post‑production correction, and provides portable, consistent lighting for smoother workflows.
Is a stable internet connection required for the synchronization process?
A stable Wi‑Fi connection is needed for the Bridge and smartphone to communicate, but the LED panel can operate via Bluetooth once paired.