Ultimate Guide: How to Build Loaner Smartphone Video Kits for Schools — Step-by-Step & Budget‑Friendly
Introduction
Schools are increasingly adopting mobile video projects to foster creativity, digital literacy, and collaborative learning. This guide explains how administrators and teachers can assemble reliable, cost‑effective loaner smartphone video kits that serve a range of classroom activities. Readers will learn the essential components, budgeting strategies, and best‑practice maintenance procedures. By the end, educators will be equipped to launch a sustainable program that empowers students to produce high‑quality video content.
Background and Context
Smartphone video production has become a cornerstone of modern pedagogy because most students already own capable devices. However, disparities in device quality and accessories can hinder equitable participation. Providing loaner kits ensures that every learner has access to consistent lighting, audio, and stability tools, thereby leveling the playing field. Moreover, well‑designed kits reduce technical barriers, allowing teachers to focus on curriculum rather than troubleshooting equipment.
Core Components of a Loaner Kit
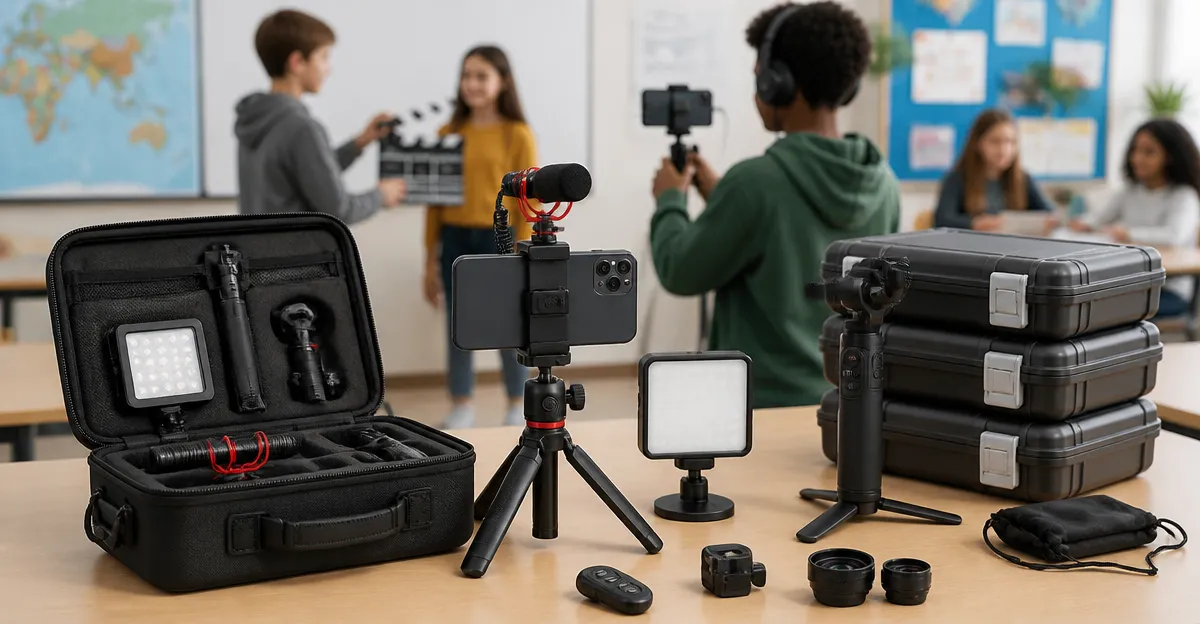
Each kit should contain four core categories: a stable tripod or selfie‑stick, adequate lighting, clear audio capture, and power management. The tripod offers hands‑free recording and smooth motion, while fill lights mitigate harsh classroom lighting. A wireless microphone captures clear speech even in noisy hallways, and a power solution keeps devices operational during extended projects. Selecting products that combine multiple functions can further reduce cost and storage requirements.
Recommended Products for Each Category
Below are curated products that align with the core components while offering excellent value for educational budgets.
Tripod and Tracking
The Yeaki Face Tracking Vlogging Kit provides a 63‑inch aluminum tripod with AI‑driven 360° face tracking, allowing students to move freely while staying centered in the frame. Its gesture controls (“OK” to start, “Palm” to stop) simplify hands‑free operation, which is ideal for solo projects. The kit also includes dual LED fill lights and a wireless microphone system, reducing the need for separate purchases. With a 4.2‑star rating from 815 reviews and a price of $39.99, it balances performance and affordability.
Extended Reach Tripod
For classrooms that require a taller setup, the Yeaki 71" Vlogging Tripod Kit extends to 71 inches and includes detachable fill lights, a dual‑mic wireless system, and a smart remote. Its 5‑stage telescopic legs and universal 1/4" thread support additional accessories such as external cameras. At $29.99 and a 4.5‑star rating from 706 reviewers, it offers a compelling budget option for larger spaces.
Professional‑Grade Rig
The SmallRig Phone Video Rig Kit is a modular solution for advanced classes that explore cinematography techniques. It features a universal quick‑release cage, dual rotating handles, a P96 RGB LED light with adjustable color temperature, and a shotgun microphone with cardioid pattern. Compatibility spans iPhone 13‑17, Samsung S22‑S24, and Google Pixel 6‑8, ensuring future‑proofness. Though priced at $161.49, its 4.4‑star rating from 206 reviews justifies the investment for specialized programs.
Magnetic Convenience
The yAyusi Magnetic Vlogging Kit integrates a magnetic lapel microphone, making attachment and removal effortless for younger students. Its 71‑inch auto‑tracking tripod, dual fill lights, and magnetic mic provide a streamlined workflow. With a 4.4‑star rating from 671 reviews and a price of $49.99, it delivers solid performance without excessive complexity.
Entry‑Level Compact Kit
The Andoer Smartphone Vlog Kit is the most economical option at $21.89, featuring a mini LED light, cardioid microphone, and a 10‑cm tripod that doubles as a handheld grip. While its 4‑star rating from 293 reviews reflects mixed experiences, it remains a viable starter for pilot programs or after‑school clubs.
Comparison and Selection Guide
Choosing the right kit depends on classroom size, project complexity, and budget constraints. The table below summarizes key attributes to aid decision‑making.
| Product | Height | Lighting | Audio | Price | Rating |
|---|---|---|---|---|---|
| Yeaki Face Tracking Vlogging Kit | 63" | 2× LED (Natural/Soft/Warm) | 2‑mic wireless (79 ft range) | $39.99 | 4.2 |
| Yeaki 71" Vlogging Tripod Kit | 71" | 2× detachable LED (3 colors) | Dual‑mic wireless (79 ft) | $29.99 | 4.5 |
| SmallRig Phone Video Rig Kit | Adjustable (no fixed height) | P96 RGB LED (2700‑6500 K) | Shotgun mic (cardioid) | $161.49 | 4.4 |
| yAyusi Magnetic Vlogging Kit | 71" | 2× fill lights (3 colors) | Magnetic lapel mic (66 ft) | $49.99 | 4.4 |
| Andoer Smartphone Vlog Kit | 10 cm (handheld) | Mini LED (5600 K) | Cardioid mic | $21.89 | 4.0 |
For elementary schools with limited storage, the Yeaki 71" kit offers height flexibility and a low price point. High‑school media labs seeking modularity should consider the SmallRig rig despite its higher cost. Schools focused on rapid deployment and magnetic convenience may prefer the yAyusi kit.
Step‑by‑Step Assembly Process
1. Unpack and inventory: Verify that each component (tripod, lights, microphones, cables, and storage bag) is present. Document serial numbers for accountability.
2. Mount the smartphone: Attach the device to the universal holder, ensuring a secure grip. For magnetic kits, align the microphone’s magnetic plate with the phone’s metal surface or use the included clip.
3. Configure lighting: Select the appropriate fill‑light mode (Natural, Soft, Warm) based on ambient conditions. Position the LEDs at a 45‑degree angle to reduce shadows.
4. Pair the wireless microphone: Turn on the transmitter and receiver, then press the pairing button. Verify audio levels using the smartphone’s monitoring feature.
5. Test face‑tracking or remote control: Activate the AI tracking gesture (“OK”) and observe the tripod’s response. Adjust sensitivity in the companion app if needed.
6. Power management: Charge all batteries overnight using the included Type‑C cables. Label each charger to avoid cross‑use.
7. Documentation and checkout: Record the kit’s condition in a digital log, and assign it to a student or teacher with a signed agreement.
Best Practices & Tips
• Standardize accessories: Use the same cable type across all kits to simplify charging stations. • Implement a rotation schedule: Rotate kits weekly to ensure even wear and to provide all classes with access. • Store in protective cases: Keep kits in the provided storage bags and add a small desiccant packet to prevent moisture damage. • Provide quick‑start guides: Print a one‑page cheat sheet highlighting gesture controls, microphone pairing, and troubleshooting steps. • Leverage free editing software: Pair the hardware with open‑source video editors such as DaVinci Resolve or Shotcut to keep costs low.
Frequently Asked Questions
Q1: How many kits are needed for a class of 30 students? A typical rotation model uses three to four kits, allowing groups of 7‑10 students to share equipment while the teacher monitors progress.
Q2: Can these kits be used with tablets? Yes, most kits include universal 1/4" threads and Bluetooth remotes that are compatible with tablets, though the phone holder may require an adapter for larger devices.
Q3: What is the battery life for the wireless microphones? All featured kits provide approximately 12 hours of continuous use after a 2‑hour fast charge, which is sufficient for a full school day.
Q4: Are the lights safe for prolonged indoor use? The LEDs operate at low heat levels (under 30°C) and are designed for continuous operation up to 6‑8 hours, making them safe for classroom environments.
Q5: How can schools protect against loss or damage? Implement a signed checkout form, attach a low‑cost RFID tag to each bag, and conduct routine visual inspections weekly.
Q6: Is additional software required for AI face tracking? Most kits include a companion app that is free to download; the AI processing occurs on the smartphone, so no extra software purchase is necessary.
Q7: Can the kits be used for live streaming? Absolutely. The combination of stable tripod, fill lighting, and wireless mic enables high‑quality live streams on platforms such as YouTube, TikTok, or school‑hosted portals.
Conclusion
Building loaner smartphone video kits empowers schools to integrate multimedia projects without prohibitive costs. By selecting the appropriate tripod, lighting, and audio solutions—such as the Yeaki, SmallRig, yAyusi, or Andoer products—educators can create flexible, durable kits that support a wide range of curricular activities. Proper inventory management, regular maintenance, and clear instructional resources ensure long‑term success and equitable student access.
Products Featured in This Guide
Yeaki Face Tracking Vlogging Kit
Price: $39.99 | Rating: 4.2/5 (815 reviews)
Featured for its AI‑driven 360° face tracking, dual LED fill lights, and wireless microphone system, providing an all‑in‑one solution at a modest price.
Yeaki 71" Vlogging Tripod Kit
Price: $29.99 | Rating: 4.5/5 (706 reviews)
Chosen for its taller 71‑inch reach, detachable dual fill lights, and robust dual‑mic wireless system, ideal for larger classroom spaces.
SmallRig Phone Video Rig Kit
Price: $161.49 | Rating: 4.4/5 (206 reviews)
Included for its modular quick‑release cage, professional RGB LED light, and shotgun microphone, serving advanced media courses.
yAyusi Magnetic Vlogging Kit
Price: $49.99 | Rating: 4.4/5 (671 reviews)
Highlighted for its magnetic lapel microphone and 71‑inch auto‑tracking tripod, offering a streamlined setup for younger learners.
Andoer Smartphone Vlog Kit
Price: $21.89 | Rating: 4/5 (293 reviews)
Selected as an entry‑level, ultra‑compact option for pilot programs or after‑school clubs with tight budgets.