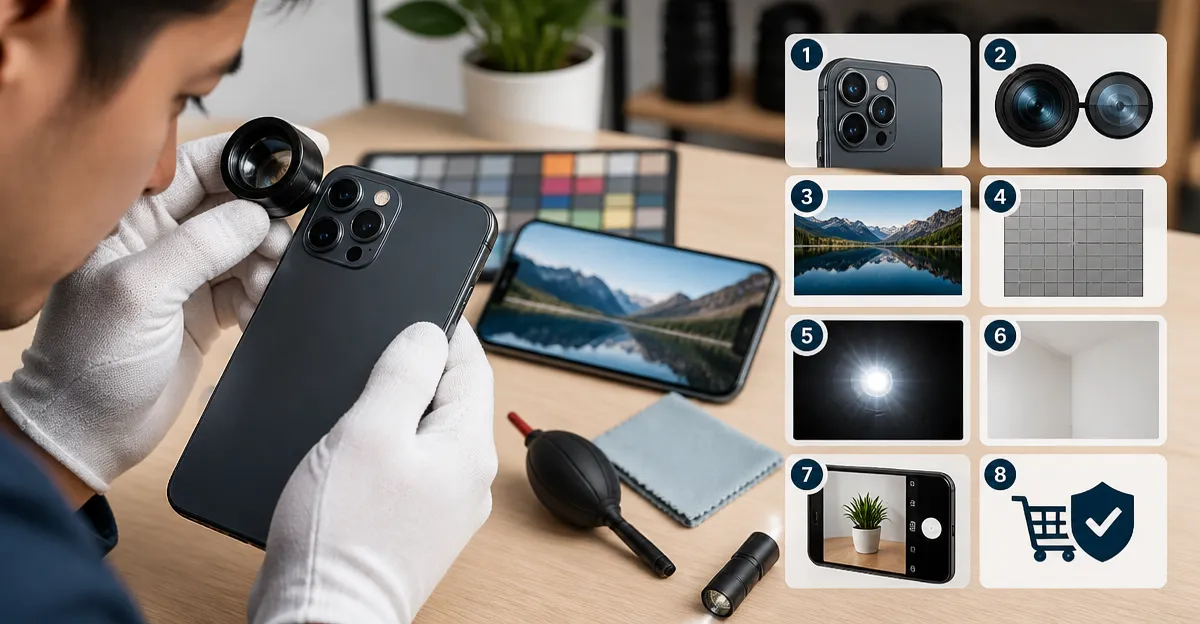
Introduction
When one purchases a used smartphone lens, the primary concern is whether the optical performance matches the seller’s description. This guide provides a systematic, step‑by‑step checklist that enables the reader to assess image quality, mechanical integrity, and overall usability before committing to a purchase. By following the procedures outlined herein, one can avoid common scams, such as misrepresented zoom ranges or hidden scratches that degrade performance. The reader will also become familiar with essential accessories that simplify testing and improve accuracy.
Testing used lenses requires a blend of visual inspection, controlled photography, and comparative analysis against known standards. The process described below is applicable to a wide range of lenses, including telephoto, macro, wide‑angle, and fisheye models. Each step is presented in a logical order, beginning with basic safety checks and culminating in detailed image evaluation. The guide is written for an intermediate audience that possesses basic photography knowledge but seeks a reliable methodology.
What You Will Need
- Smartphone with a functional camera module
- Clean, lint‑free microfiber cloth
- Neutral gray card or white sheet for exposure testing
- Tripod or stable surface to eliminate camera shake
- Lighting source (natural daylight or LED panel)
- Optional accessories: MIAO LAB TeleZoom Lens, APEXEL Macro Lens, Godefa 14‑in‑1 Lens Kit, KEYWING Fisheye Lens, Evil Eye 18X Telephoto Lens
Step 1: Visual Inspection and Physical Compatibility
The first step is to examine the lens for obvious physical defects. One should look for scratches on the front and rear glass, chips at the edges, and any signs of delamination in the housing. Using a microfiber cloth, gently wipe the optical surfaces to remove dust; this also reveals hidden smudges that could affect image clarity. Verify that the universal clip or mounting system aligns with the smartphone’s camera module; a mismatch may indicate that the lens is not truly universal.
For lenses that employ a clip‑on mechanism, such as the MIAO LAB TeleZoom Lens, the aluminum body should feel solid and the locking clamp should engage without excessive force. The MIAO LAB lens weighs only 171 g, making it easy to handle during inspection. Its aerospace‑grade aluminum construction reduces the likelihood of warping, which is a common issue in lower‑quality used lenses. If the clip feels loose or the lens body is unusually heavy, the item may have been modified or damaged.
Step 2: Mounting Test and Stability Check
After confirming physical compatibility, attach the lens to the smartphone and observe the stability of the connection. The lens should sit flush against the camera without gaps, and the clip should hold the device securely even when the phone is tilted. Perform a quick shake test by gently moving the phone; any wobble may cause image blur, especially at higher zoom levels.
When testing a high‑magnification lens such as the Evil Eye 18X Telephoto Lens, stability becomes critical because even minor movement is amplified. The Evil Eye lens weighs 120 g and includes a detachable tripod, which can be employed to eliminate hand‑shake during the evaluation. Using the tripod, one can verify that the mounting mechanism locks firmly and does not loosen under its own weight.
Step 3: Focus Accuracy and Zoom Functionality
With the lens mounted, assess the focus ring or zoom mechanism for smooth operation. Rotate the zoom ring on the MIAO LAB TeleZoom Lens and note whether it clicks into distinct positions or slides continuously. The lens offers a true optical zoom range of 5× to 10×; any resistance or grinding may indicate internal misalignment.
For macro lenses, such as the APEXEL Macro Lens, focus distance is critical. Position a small object (e.g., a coin) at the recommended 4‑7 cm working distance and adjust the focus until the subject appears sharp. The APEXEL lens incorporates five high‑quality glass elements with multi‑coating, providing a bright, distortion‑free image when properly focused. If the focus ring does not reach a crisp result, the internal optics may be misaligned.
Step 4: Image Sharpness Test Using a Resolution Chart
Sharpness can be quantified by photographing a standard resolution chart or a printed newspaper text. Place the chart on a flat surface, ensure even lighting, and capture an image at the lens’s maximum zoom or magnification. Examine the photo on a computer screen, zooming to 100 % to check for edge softness, chromatic aberration, or ghosting.
The MIAO LAB TeleZoom Lens employs a 10‑element, 6‑group optical design with full multi‑coating, which should produce high contrast and minimal flare even at 10×. In the test image, one should observe crisp lines and accurate color reproduction. If the image exhibits noticeable softness or color fringing, the lens may have suffered internal damage or coating degradation.
Step 5: Light Transmission and Vignetting Evaluation
To evaluate light transmission, photograph a uniformly illuminated white surface (such as a gray card) and compare the histogram to a reference shot taken without any lens attached. The APEXEL Macro Lens, with its large aperture design, should allow a bright exposure without needing to increase ISO or exposure time. A significant drop in brightness indicates poor transmission, possibly due to scratched coatings.
Vignetting, the darkening of image corners, can be assessed by examining the same white surface for edge dimming. The Godefa 14‑in‑1 Lens Kit includes a 0.63× wide‑angle lens that should exhibit minimal vignetting if the optics are intact. Excessive darkening may suggest misaligned elements or a damaged lens barrel.
Step 6: Distortion and Field‑of‑View Verification
Distortion is most apparent in wide‑angle and fisheye lenses. Mount the KEYWING Fisheye Lens and photograph a straight line (such as a building edge) to observe barrel distortion. The KEYWING lens utilizes advanced lanthanide optical glass that reduces ghosting while preserving the characteristic 198° curvature.
For the Godefa kit’s kaleidoscope and starburst lenses, capture a scene with strong point light sources and verify that the intended effects appear without unintended color shifts. Accurate field‑of‑view measurements can be taken by comparing the angular coverage of the lens to its specifications; any deviation may indicate a mis‑manufactured or altered element.
Step 7: Color Fidelity and Contrast Check
Color fidelity is essential for professional‑grade photography. Photograph a color chart under neutral daylight and compare the captured colors to the reference values. The Evil Eye 18X Telephoto Lens, featuring BAK4 prisms and Full Multi‑Coated (FMC) glass, should render vibrant, true‑to‑life colors even at extreme magnification.
If the image displays a bluish or reddish cast, the lens coating may be compromised, or the prism alignment could be off. Contrast can be measured by photographing a scene with both bright highlights and deep shadows; a high‑quality lens will maintain detail in both areas without crushing highlights.
Step 8: Practical Field Test
Finally, conduct a real‑world test by using the lens in the environment for which it is intended. For a telephoto lens, capture distant subjects such as a bird on a branch; for a macro lens, photograph a flower’s petals; for a fisheye lens, shoot a group photo at a concert. Review the images on a larger display to confirm that the lens meets expectations.
During this field test, note any issues such as autofocus lag (if the phone’s software interacts with the lens), battery drain, or difficulty attaching the lens over a protective case. The MIAO LAB TeleZoom Lens’s case‑friendly clip is designed to work with slim phone cases, reducing the need to remove protection. If the lens cannot be attached without removing the case, the user may experience inconvenience that outweighs the benefit.
Tips & Pro Tips
- Always clean the optical surfaces with a microfiber cloth; avoid using alcohol or harsh chemicals that can damage anti‑reflective coatings.
- Perform tests in consistent lighting conditions; daylight provides the most reliable baseline for color and exposure comparison.
- When evaluating zoom lenses, use a tripod to eliminate camera shake, which can be mistaken for optical blur.
- Document each test with notes and sample images; this record assists in making an informed purchase decision.
- Consider purchasing a protective case for the lens itself, especially for travel kits like the Godefa 14‑in‑1 set, to prevent accidental damage.
Troubleshooting
Problem: Image appears soft at maximum zoom.
Solution: Re‑examine the focus ring for proper calibration; ensure that the lens is mounted flush against the phone camera and that no debris is present between the lens and sensor.
Problem: Excessive flare or ghosting in bright conditions.
Solution: Verify that the multi‑coating on the lens surfaces is intact; if the coating is scratched, the lens may need professional refurbishment or replacement.
Problem: Lens clip does not stay attached to the phone.
Solution: Check that the phone case thickness does not exceed the clip’s maximum capacity; remove the case or select a clip‑on lens with a larger opening, such as the Evil Eye 18X Telephoto Lens, which accommodates phones up to 0.98 in thick.
Conclusion
Testing a used smartphone lens before purchase is a disciplined process that safeguards the buyer against substandard products and fraudulent listings. By following the checklist—from visual inspection through practical field testing—one can verify optical performance, mechanical integrity, and compatibility with the intended device. The recommended accessories, including the MIAO LAB TeleZoom Lens, APEXEL Macro Lens, Godefa 14‑in‑1 Kit, KEYWING Fisheye Lens, and Evil Eye 18X Telephoto Lens, serve as reliable tools that streamline each testing phase. Armed with this knowledge, the reader can make confident purchasing decisions and enjoy high‑quality mobile photography.
Products Mentioned in This Guide
Frequently Asked Questions
How can I visually inspect a used smartphone lens for scratches or damage?
Examine the lens under bright, angled light and use a magnifying glass to spot any scratches, chips, or haze that could affect image clarity.
What simple test confirms the advertised zoom range of a used lens?
Capture a static subject at the lens's minimum and maximum focal lengths, then compare the framing to the specifications to verify the zoom range.
Which accessories improve the accuracy of testing a used smartphone lens?
A tripod, a calibrated test chart, and a lens cleaning kit ensure stable shots and reliable evaluation of sharpness and distortion.
How do I evaluate image quality quickly without specialized software?
Take photos of a high‑contrast scene and a fine‑detail test chart, then inspect for softness, chromatic aberration, or vignetting on the phone’s screen.
What safety precautions should I follow when testing a used smartphone lens?
Ensure the phone’s battery is fully charged, disconnect any external power sources, and handle the lens by its edges to avoid fingerprints or accidental drops.