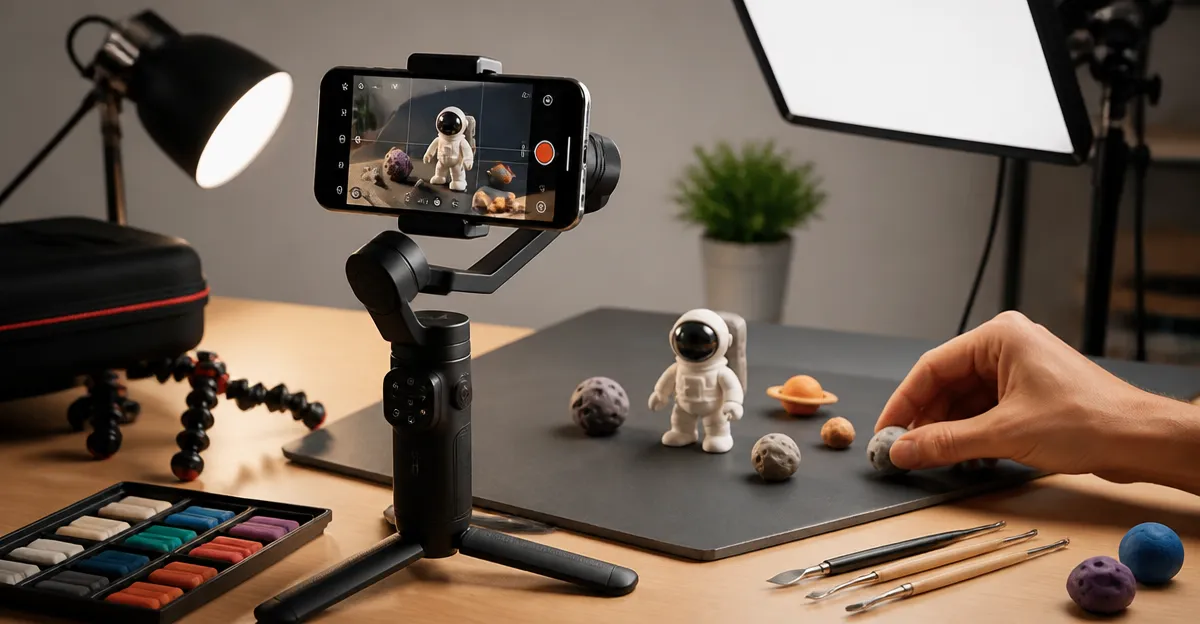
How to Shoot Smooth Smartphone Stop‑Motion: Step‑by‑Step Lighting, Tripod Setup & Pro Tips
Introduction
Stop‑motion animation transforms ordinary objects into lively stories by capturing a series of still images and playing them back at speed. This guide teaches the reader how to achieve smooth, professional‑grade results using a smartphone, proper lighting, and the right tripod tools. By following each step, one will understand the workflow from planning the scene to exporting the final video, and will gain insight into common pitfalls and how to avoid them.
Although the techniques described can be executed with basic household items, the recommended accessories enhance stability, reduce shake, and streamline the process. The guide balances accessibility with depth, making it suitable for intermediate creators who already possess a smartphone camera but seek higher consistency and visual polish.
Readers will learn how to select the appropriate tripod for their shooting environment, how to set up consistent lighting, and how to capture frames efficiently. The final sections provide pro tips, troubleshooting advice, and a concise product summary.
What You'll Need
- Smartphone with a good camera (iOS or Android)
- Tripod – choose one of the three recommended models below
- LED lighting panel or natural light source
- Remote shutter (Bluetooth or wired) – most tripods include one
- Stop‑motion app (e.g., Stop Motion Studio, Clayframes)
- Background surface and props for your scene
Step 1 – Plan Your Scene
Begin by sketching a storyboard that outlines the key actions and frame count. Determine the total duration of the final video and calculate the required frames per second (FPS). For smooth motion, 12–15 FPS is typical for short social media clips, while 24 FPS yields a cinematic feel. Write down the number of shots needed for each movement and label the positions of objects on the set.
Planning reduces the time spent adjusting props between captures and ensures consistent composition. It also helps you decide whether you need a tall tripod for overhead shots or a flexible one for low‑angle perspectives.
Once the storyboard is complete, gather all props and arrange them on a clean, non‑reflective surface. Keep the background consistent to avoid flickering shadows during playback.
Step 2 – Set Up Consistent Lighting
Consistent lighting is the cornerstone of smooth stop‑motion because any variation creates flicker in the final video. Position two LED panels at 45‑degree angles on either side of the set to produce soft, even illumination. If natural light is used, shoot near a window with diffused curtains and avoid direct sunlight.
Measure the light intensity with a smartphone lux meter app and aim for a stable exposure of around 800–1200 lux. Turn off any overhead fluorescent lights that may pulse at 50/60 Hz, as this can cause banding.
White balance should be set manually on the smartphone to prevent color shifts between frames. Use a gray card or a white sheet of paper to set the correct temperature before beginning the capture sequence.
Step 3 – Assemble the Tripod and Mount Your Smartphone
Choosing the right tripod depends on the shooting angle and portability requirements. For most indoor tabletop scenes, the Amazon Basics Flexible Tripod provides a compact solution. Its flexible legs wrap around furniture or poles, allowing low‑angle placement without sacrificing stability. The tripod includes a wireless remote with a 30‑foot range, which lets you trigger the shutter without touching the phone, thereby eliminating camera shake. At $14.99 and a rating of 4.4/5 from 6,237 reviews, it offers excellent value for beginners.
If you need a taller setup for overhead shots, the K&F CONCEPT Travel Tripod extends up to 75 inches, providing the height required to look straight down on a tabletop. Its pentagonal tube design adds rigidity while keeping the weight low at 2.6 lb. The built‑in bubble level ensures the camera plane remains perfectly horizontal, which is critical for preventing a wobbly horizon in the final animation. Priced at $29.94 with a 4.5/5 rating from 2,673 reviewers, it balances portability with professional‑grade features.
For outdoor or heavy‑equipment scenarios, the Victiv Heavy‑Duty Tripod offers a sturdy 74‑inch height and a robust 3‑way pan head. Its aluminum construction can support DSLR‑class cameras, but it also includes a universal phone holder, making it versatile for smartphone stop‑motion on location. The tripod’s weight hook allows you to add a sandbag for extra stability on windy days. At $31.99 and a 4.6/5 rating from 4,186 reviews, it is a reliable choice for demanding shoots.
After selecting the appropriate tripod, attach the smartphone using the included clamp or a universal phone holder. Tighten the screws evenly to avoid tilting. Verify that the phone’s screen is visible for framing, or use a Bluetooth remote to keep the device locked in place.
Step 4 – Configure Your Smartphone Camera Settings
Open the camera app or your chosen stop‑motion application and set the resolution to the highest native setting (e.g., 1080p at 30 fps). Disable any automatic exposure or focus features; instead, use manual focus and lock exposure to maintain consistency across frames. Turn off image stabilization, as the tripod already provides a steady platform and the stabilization can introduce micro‑adjustments that appear as jitter.
Enable the grid overlay to keep your composition aligned with the rule of thirds. This visual aid helps maintain consistent framing when moving objects incrementally. If the app supports RAW capture, consider using it for greater post‑processing flexibility, especially when adjusting color balance.
Finally, connect the Bluetooth remote that came with your tripod. Test the remote to ensure it triggers the shutter without causing the phone to move. This hands‑free method is essential for maintaining a steady camera position throughout the shoot.
Step 5 – Capture Each Frame Methodically
With the scene set, begin capturing frames one at a time. Move the objects in small, consistent increments—typically 1‑2 mm for smooth motion. Use a ruler or a marked surface to gauge the distance moved, especially for intricate movements such as walking or rotating parts.
After each adjustment, press the remote to capture a frame. Review the image on the phone’s screen to confirm focus and exposure remain unchanged. If a frame appears out of alignment, delete it and retake the shot to avoid jitter in the final sequence.
Maintain a steady workflow: adjust, capture, and repeat. For longer sequences, consider taking short breaks to prevent fatigue, which can lead to inconsistent movements.
Step 6 – Assemble and Export the Video
Once all frames are captured, import them into the stop‑motion app. Arrange the images in chronological order and set the playback speed to the desired FPS. Most apps allow you to add sound effects or background music; choose royalty‑free tracks that complement the visual rhythm.
Export the video in MP4 format at 1080p resolution for optimal compatibility with social media platforms. Before publishing, preview the video on a larger screen to check for any flickering or unintended jumps. Minor adjustments can be made by deleting or duplicating frames within the app.
Finally, share the animation on your preferred channels, and consider adding captions that explain the creative process to engage your audience.
Tips & Pro Tips
- Use a matte black backdrop to minimize reflections and keep the focus on the subject.
- Apply a small amount of petroleum jelly to the tripod’s rubber pads for extra grip on smooth surfaces.
- When shooting at night, use a dimmable LED panel with a color temperature of 5600 K to mimic daylight without introducing noise.
- For complex animations, shoot a short test segment of 10 frames to verify lighting and focus stability before committing to the full sequence.
- Keep a notebook of frame counts and object positions; this log helps you replicate movements accurately if you need to redo a segment.
Troubleshooting
Flickering Light: If the video shows flicker, switch off any fluorescent lights and replace them with continuous LED sources. Ensure the smartphone’s exposure is locked.
Camera Shake: Verify that the tripod legs are fully extended and locked. Use the remote rather than tapping the screen to avoid inadvertent movement.
Out‑of‑Focus Frames: Manually focus on a fixed point in the scene before starting the capture. Lock focus in the camera settings and avoid touching the lens.
Conclusion
By following this structured workflow—planning the storyboard, establishing consistent lighting, selecting the appropriate tripod, configuring camera settings, capturing methodical frames, and exporting the final video—one can produce smooth, professional stop‑motion animations with a smartphone. The recommended tripods each address specific shooting scenarios, from compact indoor setups to tall outdoor rigs, ensuring stability and ease of use. Armed with these tools and techniques, creators can bring their imaginative concepts to life and share compelling visual stories.
Products Mentioned in This Guide
Frequently Asked Questions
What tripod features are essential for smooth smartphone stop‑motion?
A stable, adjustable tripod with a smartphone mount, quick‑release plate, and a fluid head helps keep the camera steady and allows precise positioning between frames.
How can I achieve consistent lighting for stop‑motion scenes?
Use continuous, diffused light sources such as LED panels or softboxes placed at the same angle and intensity for each shot, and avoid flickering or changing ambient light.
Which smartphone apps are best for capturing stop‑motion frames?
Apps like Stop Motion Studio, PicPlayPost, and Lapse It let you manually advance frames, set exposure locks, and preview the animation in real time.
How do I prevent camera shake when moving the tripod between shots?
Lock all tripod legs and the head, use a remote shutter or timer, and keep the smartphone mount tightened before each capture.
What common mistakes cause choppy stop‑motion and how can I fix them?
Uneven lighting, inconsistent frame intervals, and accidental camera movement cause jitter; correct them by locking exposure, using a steady tripod, and maintaining the same shot distance throughout the sequence.