How to Calibrate Your Phone Lens: Step-by-Step Guide to Sharper Smartphone Photos
In the modern era, a smartphone often replaces a dedicated camera for everyday photography. However, even the most advanced phone lenses can suffer from focus drift, especially after repeated use or when accessories are added. This guide explains how to calibrate your phone lens to achieve consistently sharp images, why calibration matters, and which tools can streamline the process.
Readers will learn to assess focus accuracy, adjust micro‑focus settings where supported, and employ accessories that improve stability and precision. By following the steps, one can reduce soft spots, eliminate front‑ or back‑focusing, and capture images that rival those taken with entry‑level interchangeable‑lens cameras.
What You'll Need
- A stable tripod or a sturdy surface.
- A calibration card such as the DSL RKIT Lens Calibration Tool (pack of 2).
- A phone lens kit (wide‑angle, macro, or fisheye) to test different focal lengths, for example the Xenvo Pro Lens Kit.
- A universal phone cage to secure the device and accessories, such as the SmallRig Universal Phone Cage.
- A computer or large display for detailed image inspection.
Step 1: Prepare a Level Shooting Platform
Begin by mounting your smartphone on a stable tripod or a flat table. Stability is essential because any movement during the test can be misinterpreted as focus error. Attach the SmallRig Universal Phone Cage to the tripod; the cage provides a secure grip, multiple mounting points, and anti‑slip silicone handles that keep the phone steady.
The cage weighs only 120 g and is compatible with the latest iPhone and Android models, ensuring a snug fit without the need for additional adapters. Its aluminum alloy construction adds durability while remaining lightweight, making it ideal for prolonged calibration sessions.
Once the phone is secured, verify that the device is level by using a built‑in spirit level app or a bubble level accessory. A perfectly horizontal setup guarantees that the calibration card will be photographed perpendicularly, which is crucial for accurate measurements.
With the platform ready, proceed to the next step: positioning the calibration card.
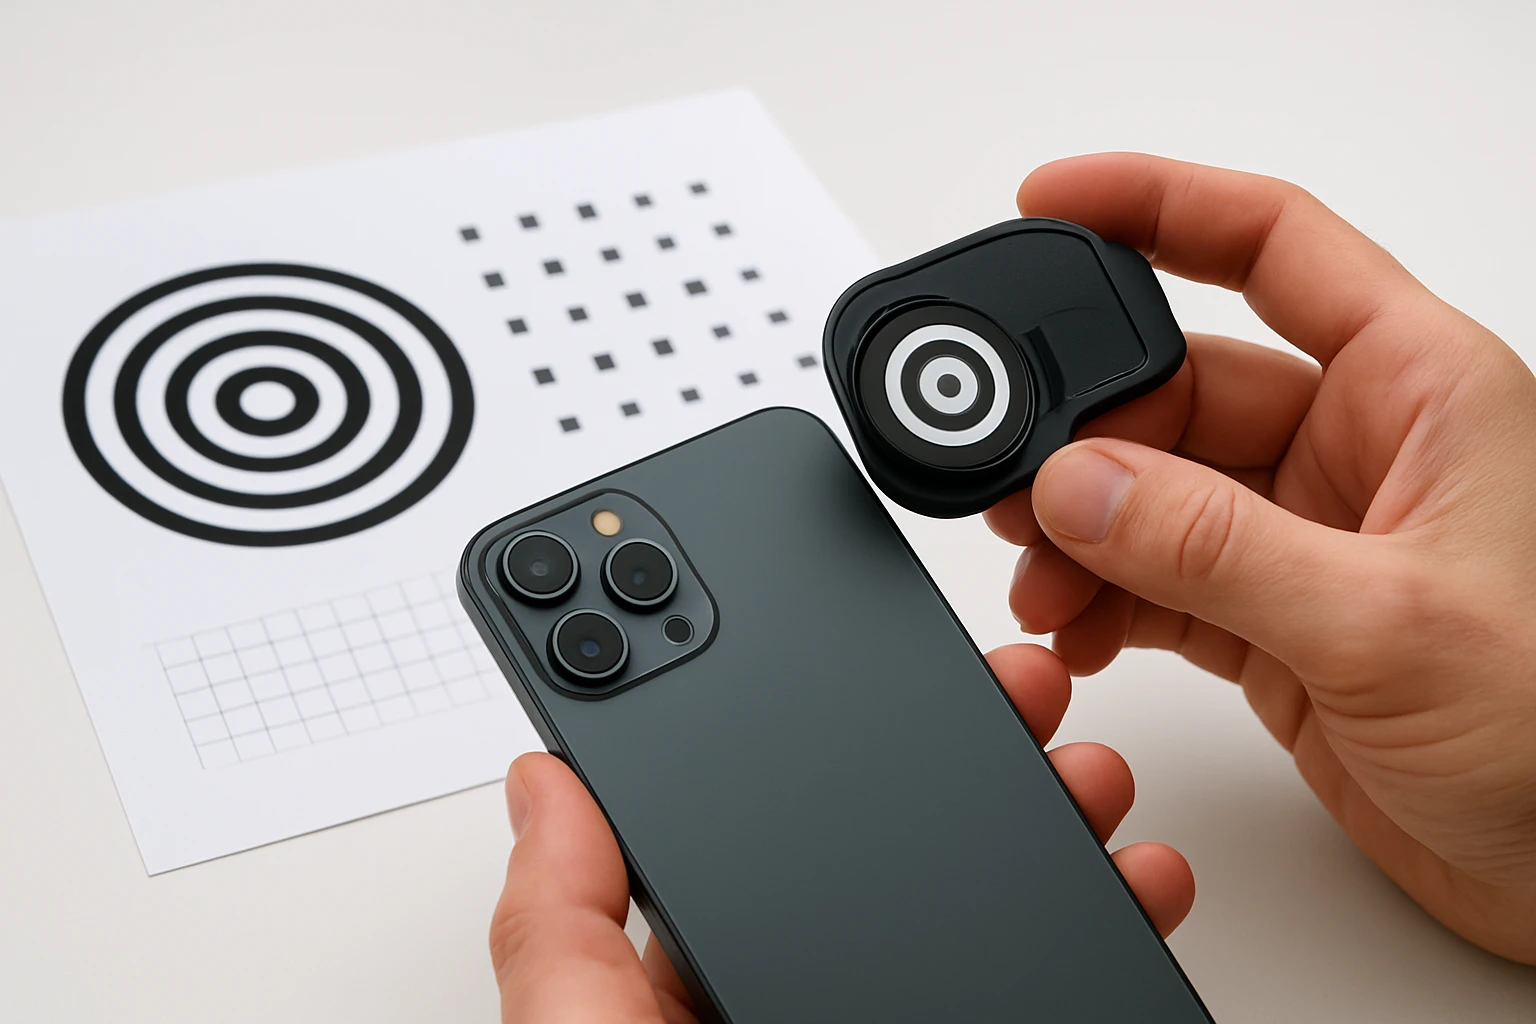
Step 2: Position the DSL RKIT Lens Calibration Tool
Unfold the DSL RKIT Lens Calibration Tool and place it on the same height as the smartphone lens. The card measures 28 × 18 cm and features a central QR code surrounded by a graduated scale from -5 to +5.
Set the phone to its widest aperture (e.g., f/1.8) to achieve the shallowest depth of field. This maximizes the visual difference between in‑focus and out‑of‑focus zones, making it easier to identify front‑ or back‑focus.
Align the phone so that the lens axis is exactly perpendicular to the card surface. Use the cage's side handles to fine‑tune the angle; the built‑in Allen wrench allows micro‑adjustments without removing the phone.
When the alignment is correct, trigger the autofocus on the QR code and capture a photo. The calibration card is designed to show the sharpest point at the “0” mark when focus is accurate.
Step 3: Analyze the Capture for Focus Errors
Transfer the image to a computer and view it at 100 % zoom. Observe the numbered scale: if numbers above zero appear sharper, the lens is back‑focusing; if numbers below zero are clearer, it is front‑focusing.
Document the deviation in millimeters; most modern smartphones allow a micro‑adjustment setting within the camera app or through manufacturer‑specific utilities. For devices that lack a built‑in adjustment, the next step involves using an external lens kit to compensate.
Record the findings in a simple table so you can track improvements after each adjustment. This systematic approach mirrors professional DSLR calibration workflows, ensuring repeatable results.
Having identified the focus offset, you are ready to apply corrective tools.
Step 4: Apply Micro‑Adjustment Using a Lens Kit
If your phone supports software‑based focus tuning (e.g., Samsung's “Pro Mode” or Apple's “Camera Calibration” in iOS 17), input the measured offset to fine‑tune the autofocus algorithm. For phones without native support, attach a dedicated lens kit to modify the effective focal plane.
The Xenvo Pro Lens Kit includes a TruView wide‑angle lens and a Clarus macro lens, both crafted from aircraft‑grade aluminum and premium optical glass. The macro lens, in particular, shortens the minimum focusing distance, allowing you to place the calibration card slightly closer and thereby offset minor back‑focus tendencies.
Install the desired lens by clipping it onto the phone using the kit's TruGrip lens clip. The clip provides a secure, wobble‑free connection, and the included quick‑release lanyard ensures rapid swapping between lenses during testing.
After attaching the lens, repeat the capture process from Step 2. The added optical element should shift the focus plane, effectively compensating for the previously measured error.
Step 5: Verify Consistency Across Focal Lengths
Smartphone photographers often switch between wide‑angle, macro, and fisheye perspectives. It is essential to confirm that calibration holds for each configuration.
Use the LEKNES 3‑in‑1 Phone Lens Kit to test wide‑angle (120°), macro, and fisheye settings. The kit's independent lenses prevent stacking, allowing swift transitions without recalibrating the mount.
For each lens, repeat the QR‑code capture and evaluate the focus scale. Minor variations are normal; however, if any lens consistently shows a deviation greater than ±1, consider adjusting the camera's software settings or swapping to a higher‑quality lens such as the Godefa 14‑in‑1 Camera Lens Kit, which offers superior glass and a broader selection of optical effects.
Document the results for future reference; a calibrated phone will retain accuracy as long as the lens elements remain clean and undamaged.
Tips & Pro Tips
- Always clean the phone camera lens and any attached lenses with a microfiber cloth before testing; dust can mimic focus errors.
- Perform calibration in a well‑lit environment; low light can cause the autofocus system to hunt, leading to false readings.
- If your phone supports a “focus lock” feature, enable it during the test to prevent the camera from refocusing between shots.
- When using macro lenses, maintain a distance of 0.5–1 inch from the subject to achieve optimal sharpness.
- Store calibration cards and lenses in a protective case (the SmallRig cage includes a built‑in storage compartment) to avoid accidental damage.
Troubleshooting
Problem: The calibration image appears uniformly soft, with no discernible sharp point.
Solution: Verify that the phone’s autofocus is set to “single‑point” mode and that the QR code is well‑illuminated. If the issue persists, try a different aperture or clean the lens surface.
Problem: The phone continues to back‑focus after applying micro‑adjustment.
Solution: Consider using a higher‑quality macro lens from the Godefa 14‑in‑1 Camera Lens Kit, which offers refined glass that reduces internal aberrations.
Problem: The phone cage does not fit the device securely.
Solution: Adjust the cage's height using the built‑in Allen wrench until the phone sits flush. The cage is designed to accommodate phones with a camera‑to‑edge distance of up to 1.2 inches.
Conclusion
Calibrating a smartphone lens is a straightforward process when approached methodically. By establishing a level platform, using a reliable calibration card, and leveraging accessories such as the DSL RKIT Lens Calibration Tool, the Xenvo Pro Lens Kit, and the SmallRig Universal Phone Cage, photographers can achieve consistently sharp results across a variety of focal lengths. Regular calibration ensures that the phone’s autofocus system remains accurate, extending the device's useful lifespan and enhancing creative possibilities.
One should repeat the calibration after any major firmware update or after adding new accessories, as these changes can affect focus behavior. With the tools and techniques outlined above, anyone can maintain professional‑grade image quality from a pocket‑sized camera.
Products Mentioned in This Guide
Frequently Asked Questions
Why should I calibrate my phone lens?
Calibration corrects focus drift and soft spots, ensuring consistently sharp photos across all focal lengths.
What basic tools are needed for phone lens calibration?
A stable tripod or surface, a calibration card (e.g., DSL RKIT Lens Calibration Tool), and any lens attachments you plan to use.
How do I check if my phone’s focus is accurate?
Capture a photo of a calibration chart at a known distance and examine the image for front‑ or back‑focusing on the test pattern.
Can I adjust micro‑focus settings on any smartphone?
Only phones with manual focus or pro‑mode settings allow micro‑focus tweaks; otherwise, use third‑party apps that expose these controls.
Do accessories like macro or fisheye lenses affect calibration?
Yes, each attachment changes the optical path, so you should recalibrate after adding or swapping lenses to maintain sharpness.