How to Create LUTs for Smartphone RGB Lights: Step‑by‑Step Mobile Color Grading Guide for Cinematic Video
Introduction
The modern creator often relies on a smartphone as the primary camera, yet achieving a cinematic look still requires precise color control. This guide explains how to generate custom lookup tables (LUTs) that translate the unique hue of RGB lighting into consistent, film‑like tones. Readers will learn to set up lighting, capture reference footage, build a LUT using a mobile app, and apply the result to future projects. By following these steps, one can produce professional‑grade video without investing in expensive post‑production software.
What You’ll Need
- Smartphone capable of manual exposure and color profile selection.
- RGB lighting rig such as the Andoer RGB Smartphone Video Rig.
- Tripod or stable mounting surface.
- Free mobile color‑grading app (e.g., DaVinci Resolve for mobile, LUT Generator, or Adobe Lightroom Mobile).
- File‑sharing service to move raw clips to a desktop if preferred.
Step 1: Set Up Your RGB Lighting
Begin by positioning the Andoer RGB Smartphone Video Rig so that the light source is at a 45‑degree angle to the subject’s face. The rig provides 2500‑8500 K adjustable temperature and 48 dynamic lighting effects, allowing the creator to experiment with warm, cool, or artistic color casts. Secure the rig using the built‑in 1/4‑inch screw holes or the cold‑shoe mounts for additional accessories such as a microphone. Ensure the battery is fully charged; the 1500 mAh cell delivers up to 60 minutes of continuous illumination, which is sufficient for a typical shooting session.
Why this rig is advantageous: its 20 W output and 240 LED beads produce up to 1200 lux, a brightness level comparable to professional on‑set lights yet portable enough for on‑location work. The high color rendering index (CRI 95) reproduces true colors, which is essential when creating a LUT that will later be applied to footage recorded under different lighting conditions. The multi‑layer soft‑light panel reduces harsh shadows and protects the eyes from blue‑light flicker, enabling longer shooting periods without fatigue.
Step 2: Capture Reference Footage
With the lighting configured, record a short test clip (approximately 10 seconds) of a neutral‑colored subject, such as a gray card or a person wearing a white shirt. Use the smartphone’s manual mode to lock exposure, ISO, and white balance; this creates a stable baseline for color analysis. Record the clip in the highest possible resolution and bitrate to preserve color data, as compressed footage can distort the subtle hue shifts needed for an accurate LUT.
During this step, the rig’s 0‑100 % brightness control allows the creator to fine‑tune the light intensity without altering the camera settings. By keeping the lighting constant across multiple takes, the resulting LUT will be reliable when applied to future scenes that use the same rig configuration.
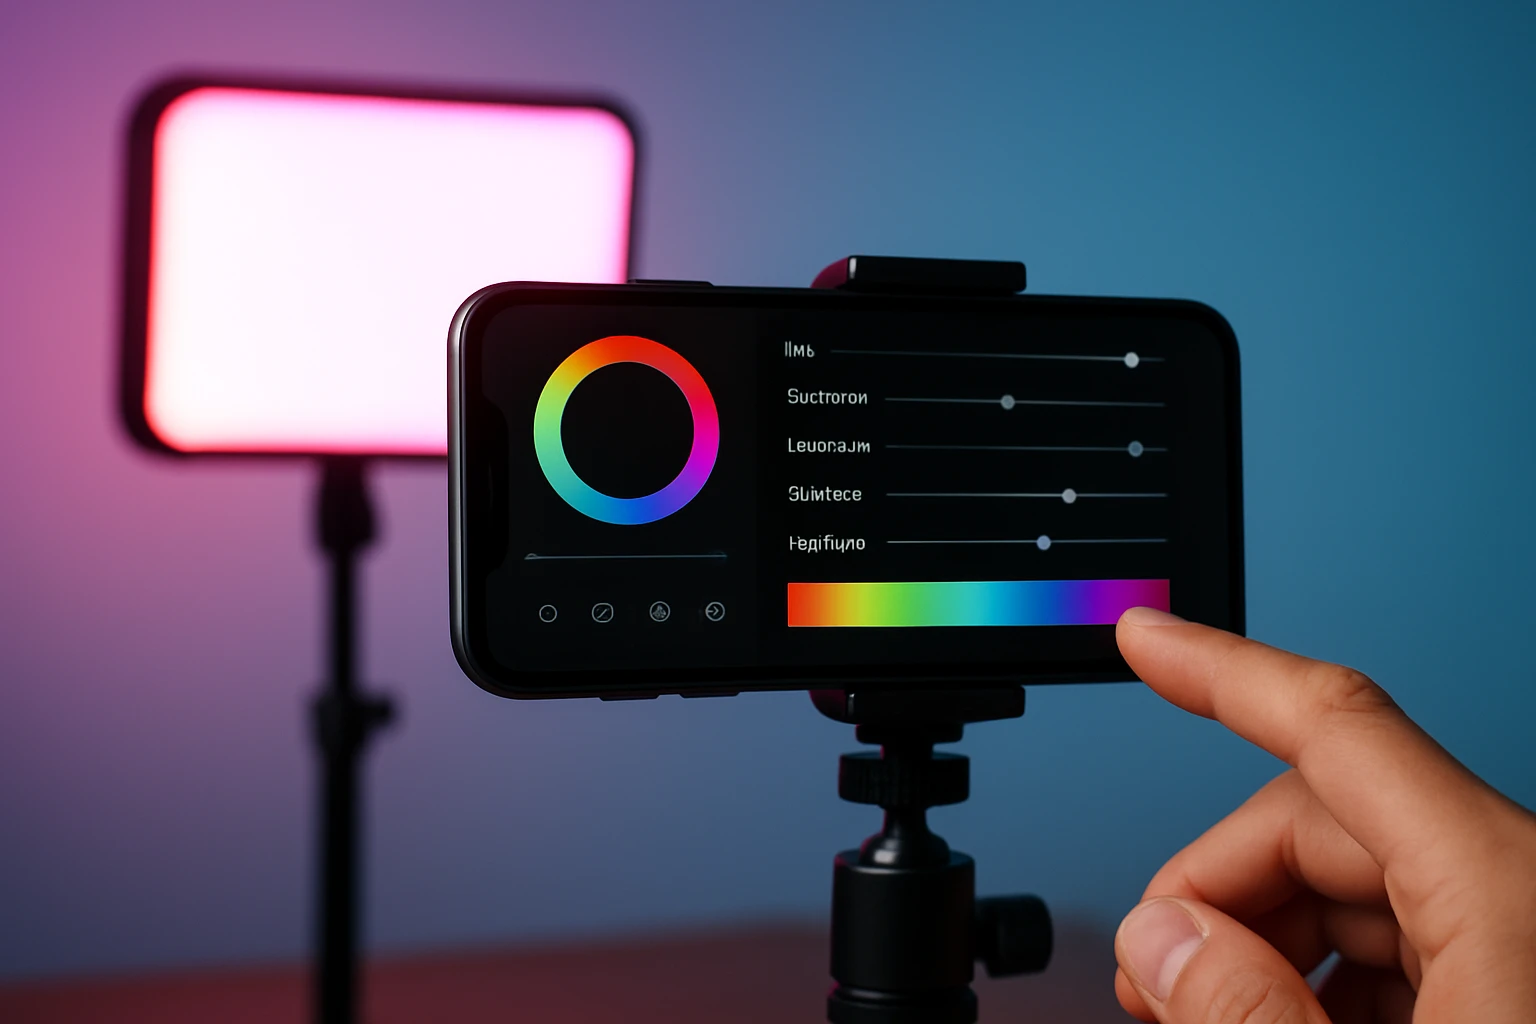
Step 3: Choose a Mobile Color‑Grading App
Several free or low‑cost applications enable users to create custom LUTs directly on a mobile device. DaVinci Resolve for mobile offers a robust node‑based workflow, while LUT Generator provides a streamlined interface for beginners. Install the chosen app, import the reference clip, and navigate to the color‑correction panel.
When selecting an app, consider its ability to export 3‑DLUT files in .cube format, which is widely supported by editing software on both mobile and desktop platforms. The app should also allow precise adjustments of lift (shadows), gamma (midtones), and gain (highlights) to match the desired cinematic palette.
Step 4: Create the LUT
Open the reference clip in the color‑grading app and begin by neutralizing the image: set the white balance to a neutral gray point, then adjust exposure to achieve balanced highlights and shadows. Next, apply a creative color grade that reflects the intended mood—perhaps a teal‑orange split‑tone or a desaturated pastel look. Use the app’s histogram and waveform monitors to verify that the adjustments remain within legal broadcast limits (0‑100 I‑range).
After finalizing the grade, export the LUT by selecting the "Export LUT" or "Save as .cube" option. Name the file descriptively (e.g., "Andoer_RGB_TealOrange.cube") and store it in a cloud folder for easy retrieval. This file now encodes the exact color transformation applied to the reference clip, ready to be applied to any future footage shot with the same lighting setup.
Step 5: Apply the LUT to Future Clips
When shooting new content, replicate the lighting conditions used during the reference capture: maintain the same RGB temperature, brightness level, and mounting angle of the Andoer RGB Smartphone Video Rig. Import the new clip into the same mobile app, then load the previously saved LUT from the cloud folder. The app will instantly map the raw colors to the cinematic palette defined by the LUT, ensuring consistency across all footage.
It is advisable to perform a quick visual check after applying the LUT; minor tweaks to exposure or saturation may be required if the ambient light differs slightly. Because the LUT encodes only color information, it does not correct for dramatic changes in lighting direction or intensity, which should be managed during the setup phase.
Step 6: Export and Share Your Graded Video
Once the LUT has been applied and any final adjustments are made, export the video using the app’s highest quality settings. Choose an export codec that preserves color depth, such as H.264 High Profile or H.265 Main10, to avoid banding in the final product. Upload the finished video to the desired platform—YouTube, TikTok, or Instagram—knowing that the color grade will appear consistently across devices.
For creators who wish to reuse the LUT in desktop editing software, simply import the .cube file into programs like Adobe Premiere Pro, Final Cut Pro, or DaVinci Resolve. This cross‑platform compatibility maximizes the utility of the LUT and reduces the time spent on repetitive color correction.
Tips & Pro Tips
- Record a gray card before each shoot to quickly re‑balance white point if lighting conditions shift.
- Use the rig’s cold‑shoe mounts to attach a small shotgun microphone; clear audio complements the professional visual aesthetic.
- When grading, limit saturation boosts to no more than 20 % to maintain a natural look on skin tones.
- Store multiple LUTs for different lighting moods (e.g., warm sunrise, cool night) and switch them as needed during post‑production.
- Backup LUT files on both cloud storage and a local drive to prevent accidental loss.
Troubleshooting
Problem: The LUT appears too dark on new footage.
Solution: Verify that the exposure settings of the new clip match those of the reference clip; adjust the clip’s brightness before applying the LUT.
Problem: Color banding is visible after export.
Solution: Export using a higher bit‑depth codec (10‑bit) and avoid excessive compression settings.
Problem: The RGB light flickers in the recorded video.
Solution: Ensure the smartphone’s frame rate is synchronized with the light’s refresh rate; the rig’s matte translucent panel reduces flicker, but matching settings eliminates it entirely.
Conclusion
This guide has demonstrated a complete workflow for creating custom LUTs that translate the vibrant output of smartphone RGB lights into a cinematic color palette. By setting up the Andoer RGB Smartphone Video Rig, capturing reference footage, using a mobile grading app, and exporting a reusable .cube file, creators can achieve consistent, high‑quality color grading on the go. Consistency, preparation, and attention to detail are the keys to professional results, and the techniques outlined herein empower anyone to elevate their mobile video production.
Products Mentioned in This Guide
Frequently Asked Questions
What equipment is required to create LUTs for smartphone RGB lighting?
You need a smartphone with manual controls, an RGB lighting rig, a tripod, and a free mobile color‑grading app.
Which mobile apps can generate LUTs on a smartphone?
Popular options include DaVinci Resolve Mobile, LUT Generator, and Adobe Lightroom Mobile.
How do I capture reference footage for a custom LUT?
Set up your RGB lights, lock exposure and white balance, record a short clip of the lit scene, and keep the settings consistent.
Can I apply the created LUT to other videos on the same phone?
Yes, import the LUT into your grading app and apply it to any footage shot with similar lighting and camera settings.
Do I need a desktop to use the LUT after creating it on mobile?
No, most mobile grading apps let you save and apply LUTs directly on the phone, though you can transfer them to a desktop if preferred.