How to Set Up Mobile Green Screen Lighting for Smartphones: Step‑by‑Step Guide to Flawless Chroma Key (DIY & Budget Tips)
Introduction
Creating professional‑looking green screen videos with a smartphone is now within reach for creators of any experience level. This guide explains the essential concepts, required tools, and precise actions that produce consistent, spill‑free chroma key footage. By following each step, one can avoid common lighting pitfalls and achieve a clean separation between subject and background. The result is a versatile production workflow that supports tutorials, product demos, and creative storytelling without costly studio rentals.
What You'll Need
- Portable green screen backdrop or fabric (preferably matte and wrinkle‑free).
- Stable support for the smartphone – a tripod or monopod.
- Two or more continuous light sources with diffusion.
- Wireless Bluetooth remote for hands‑free shutter control.
- Basic editing app that supports chroma key (e.g., KineMaster, PowerDirector).
- Optional: light stands, clamps, and extension cords for flexible positioning.
Step 1: Prepare the Green Screen Surface
The first priority is to secure a uniformly illuminated green surface. One should stretch the fabric tightly across a frame or attach it to a wall using clamps to eliminate shadows and creases. If the material reflects light unevenly, the chroma key algorithm will struggle to differentiate subject from background. For small indoor spaces, a 5×7 foot collapsible backdrop works well because it folds flat for storage and can be positioned close to the subject.
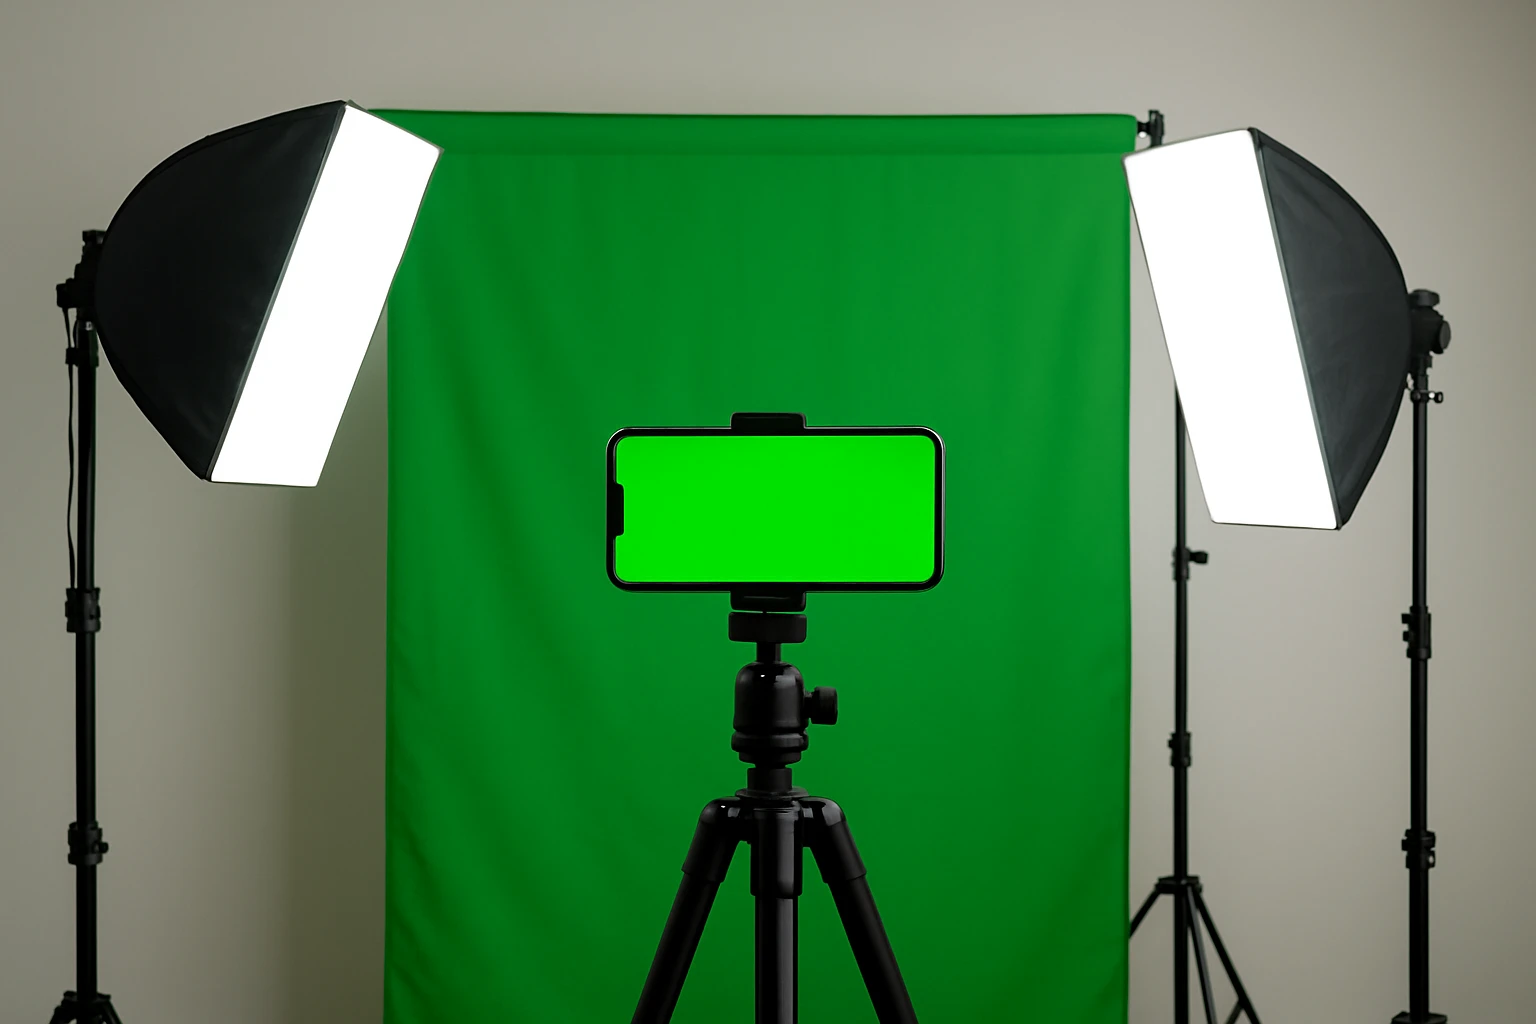
Step 2: Position Continuous Lighting
Even lighting is the cornerstone of a successful green screen. Two soft, diffused light sources should be placed at 45‑degree angles to the backdrop, each approximately three feet away. This arrangement reduces hotspots and minimizes green spill onto the subject. The RaLeno Softbox Lighting Kit 16x16 provides a compact, high‑CRI 50W LED bulb that delivers soft, shadow‑free illumination; its 16×16 inch dimensions are ideal for tabletop or portrait setups. Priced at $39.99 with a 4.6‑star rating from over 2,000 reviewers, the kit includes a reverse‑folding tripod, making it easy to store in a limited studio area. For larger spaces or when additional power is required, the Skytex 20x28 Softbox Lighting Kit offers two 20×28 inch softboxes, each paired with a dimmable 85W LED bulb that spans a color temperature range of 2700‑6400K. At $61.72 and a 4.4‑star rating, this kit supplies greater coverage and the ability to fine‑tune warmth for skin tones, which is especially useful in portrait‑focused content.
Step 3: Mount the Smartphone on a Stable Support
A steady camera platform prevents motion blur and maintains consistent framing. The Vimose 66‑Inch Phone Tripod extends to a full 66 inches, allowing one to achieve eye‑level or overhead angles without additional rigging. Its steel‑reinforced aluminum construction provides rock‑solid stability, while the integrated 1/4″ screw mount enables attachment of auxiliary accessories such as LED panels or microphones. The included Bluetooth remote, with a 10‑meter range, eliminates the need to touch the screen, thereby avoiding accidental exposure changes during recording. Priced at $17.99 and backed by 1,158 reviews averaging 4.6 stars, this tripod delivers professional‑grade flexibility at a budget‑friendly price point.
Step 4: Connect the Remote and Configure Camera Settings
Before recording, pair the Bluetooth remote with the smartphone and verify that the remote triggers both photo capture and video recording functions. Open the chosen camera app and set the resolution to the highest native setting; higher pixel counts preserve detail that aids post‑production keying. Disable auto‑focus lock and enable manual focus if the app permits, ensuring the subject remains sharp throughout the take. Adjust the exposure compensation to avoid over‑exposing the green background, which can cause color bleed during key extraction.
Step 5: Balance Exposure and White Balance
Proper exposure ensures the green screen appears evenly lit without bright patches. Use the smartphone’s histogram or exposure meter to confirm that the green background peaks around the mid‑tone region. Set the white balance manually to a fixed Kelvin value that matches the dominant light temperature—typically 5600K for daylight‑balanced LEDs. Locking white balance prevents the camera from shifting color temperature as the subject moves, which would otherwise create inconsistent key edges.
Step 6: Conduct a Test Shot and Refine
Record a brief test clip of the subject performing a simple motion while standing several feet from the backdrop. Review the footage on a larger screen and apply a temporary chroma key filter in the editing app. Look for green spill on the subject’s edges, uneven illumination, or shadows cast on the screen. If any issue appears, reposition the lights, adjust their intensity, or move the subject farther from the backdrop to reduce reflective spill. Iterate until the key appears clean and the subject is fully isolated.
Tips & Pro Tips
- Use a matte green fabric rather than glossy material; gloss creates specular highlights that are difficult to remove.
- Place a thin white reflector opposite each light to bounce a subtle fill onto the subject, reducing harsh shadows without contaminating the green background.
- When filming taller subjects, extend the Vimose tripod to its maximum height and angle the top section downward to maintain a consistent framing.
- Consider adding a diffusion panel in front of each LED if the softbox is not available; a simple white sheet can serve as an improvised diffuser.
- For outdoor shoots, use portable battery‑powered LED panels that match the color temperature of the RaLeno or Skytex kits to maintain color consistency.
Troubleshooting
Problem: Green spill appears on the subject’s shoulders.
Solution: Increase the distance between subject and backdrop by at least 3‑4 feet and add a small LED fill on the opposite side to balance the light.
Problem: Uneven lighting creates bright patches on the screen.
Solution: Adjust the angle of the softboxes, ensuring they are equidistant from the center of the backdrop, and use the dimming function on the Skytex kit to match intensity.
Problem: Remote does not trigger the smartphone.
Solution: Verify that Bluetooth is enabled, the remote is fully charged, and that the smartphone’s camera app permits external shutter control; some apps require permission settings to be adjusted.
Conclusion
By following this systematic approach, one can transform a modest indoor space into a reliable green screen studio for smartphone content creation. The combination of a sturdy tripod, diffused continuous lighting, and precise camera configuration eliminates the most common sources of chroma key failure. Whether producing tutorial videos, product demonstrations, or creative short films, the techniques outlined here empower creators to achieve professional‑grade results on a modest budget.
Products Mentioned in This Guide
Frequently Asked Questions
What lighting equipment is essential for a smartphone green screen setup?
At least two continuous lights with diffusion and a portable matte green backdrop are essential for even, spill‑free illumination.
How can I avoid shadows and uneven lighting on a mobile green screen?
Position the lights at 45‑degree angles on either side of the subject and use diffusion to soften the light, ensuring the backdrop is evenly lit.
Do I need a tripod for my phone when filming with a green screen?
Yes, a stable tripod or monopod keeps the phone steady and maintains consistent framing, which is crucial for clean keying.
Can I control the smartphone camera remotely while filming?
A Bluetooth remote lets you start/stop recording hands‑free, preventing camera shake and keeping the shot consistent.
What apps support chroma key editing on smartphones?
Popular apps like KineMaster and PowerDirector include built‑in chroma key tools for quick background replacement.