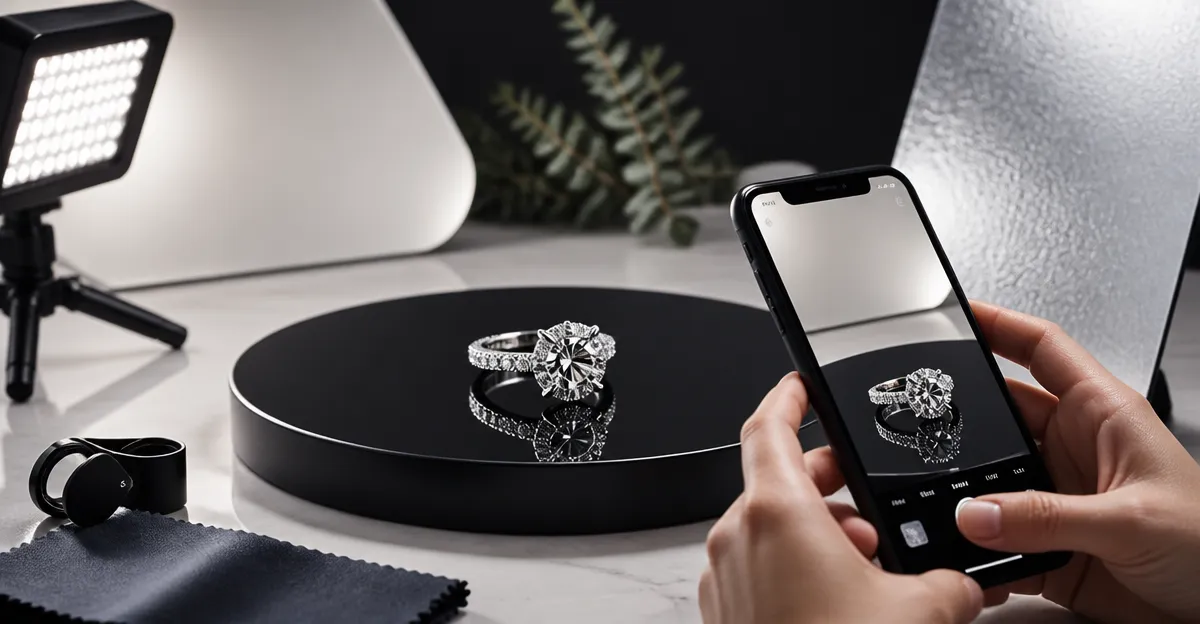
How to Light Reflective Jewelry with Your Smartphone: A Complete Photography Guide
Introduction
Photographing reflective jewelry presents a unique challenge because light can create unwanted glare, hotspots, and loss of detail. This guide explains the fundamental principles of light control, demonstrates practical setups, and recommends accessories that improve results without requiring a professional studio. Readers will learn how to evaluate lighting environments, select appropriate smartphone accessories, and apply post‑capture techniques for a polished final image.
Although the focus is on smartphones, the concepts apply to any compact camera that relies on built‑in lenses. By the end of the article, one will be able to produce images that showcase the sparkle of necklaces, rings, and earrings with confidence.
Background and Context
Reflective surfaces such as polished metal, gemstones, and glass refract light in multiple directions. When a single, harsh light source illuminates the piece, the camera sensor records bright specular highlights that obscure texture. Understanding the relationship between the light source, the subject, and the sensor is essential for controlling reflections.
Smartphones have small sensors and wide‑angle lenses, which amplify the effect of stray light. Diffused lighting, controlled angles, and the use of accessories such as phone stands and stylus pens for precise positioning can mitigate these issues. The following sections break down each component of a successful shoot.
Essential Lighting Concepts
Three concepts dominate jewelry photography: direction, diffusion, and distance. Direction refers to the angle at which light meets the jewelry; a low angle reduces glare, while a high angle can accentuate sparkle. Diffusion softens the light, spreading it evenly across the surface and minimizing harsh hotspots. Distance determines the intensity of the light; moving the source farther away reduces brightness and allows for finer control.
When using a smartphone, the built‑in flash is rarely suitable because it produces a point source directly in front of the lens, creating a mirror‑like reflection. Instead, external continuous lights, LED panels, or even natural window light are preferable. The next section outlines how to implement these ideas with affordable accessories.
Recommended Accessories for Smartphone Jewelry Lighting
Proper positioning of the smartphone is critical for consistent framing and stability. The Lamicall 360° Rotating Phone Stand provides a sturdy, weighted base and a smooth 360° pivot that allows precise angle adjustment without shaking. Its carbon‑steel construction ensures durability, and the anti‑slip silicone pads protect both the device and the work surface. With a rating of 4.8/5 from 2,570 reviews and a price of $8.99, it offers excellent value for photographers who need repeatable positioning.
Fine‑tuned focus and composition often require a stylus rather than a fingertip, especially when the screen is covered by a protective case. The Universal Capacitive Stylus Pens (10‑Pack) feature ultra‑sensitive rubber tips that respond better than a finger, even when wearing gloves. Their lightweight, clip‑on design makes them easy to carry, and the set of ten colors allows quick identification of each pen during multi‑step shoots. Priced at $5.59 and rated 4.6/5 from 9,359 reviews, they are a cost‑effective addition to any mobile photography kit.
For shoots that require variable height or a more portable solution, the Lamicall Height‑Adjustable Foldable Phone Stand extends up to 3.2 inches and supports phones with thick cases up to 0.71 inches. Its weighted metal base provides stability, while the bi‑folding design folds to pocket size for on‑the‑go sessions. With a 4.8/5 rating from 37,281 reviews and a price of $9.99, it balances flexibility and robustness.
When photographing jewelry on a flat surface such as a table or countertop, a suction mount can free the hands and allow the phone to be positioned directly above the piece. The Yojaro Silicone Suction Phone Mounts (4‑Pack) use 24 independent silicone cups inspired by octopus adhesion to hold the phone securely on glass or mirror surfaces. Although the suction cups are not reusable on the same case, they provide a stable platform for overhead shots. At $4.99 and a rating of 3.9/5 from 520 reviews, they are an affordable option for occasional use.
Finally, the PopSockets Adhesive Phone Grip offers a convenient hand‑held grip and a built‑in stand that can be used to angle the phone at low heights without a separate tripod. Its ergonomic design reduces fatigue during long shooting sessions, and the adhesive works best on smooth hard‑plastic cases. With a price of $9.94, a rating of 4.6/5 from 125,251 reviews, and a reputation for durability, it is a versatile addition to any mobile photographer’s toolkit.
Comparison and Selection Guide
| Feature | Lamicall 360° Rotating Stand | Lamicall Height‑Adjustable Foldable Stand | Yojaro Suction Mount | PopSockets Grip |
|---|---|---|---|---|
| Adjustable Angle | 360° rotation with click‑stop | 180° pivot + height up to 3.2 in | Fixed angle, suction‑based | Fold‑out stand, limited angle |
| Portability | Foldable, moderate size | Bi‑fold, pocket‑size | Small suction pads | Compact grip |
| Load Capacity | Supports phones 4‑10 in | Supports phones 4‑8 in, thick cases | Works with standard phones | Supports most phones with case |
| Price | $8.99 | $9.99 | $4.99 | $9.94 |
| Average Rating | 4.8 | 4.8 | 3.9 | 4.6 |
Choose the 360° Rotating Stand when precise angular control is required and the shooting area is stable. Opt for the Height‑Adjustable Foldable Stand for travel or when a higher viewing position is needed. The Suction Mount excels for overhead flat‑lay compositions on glass surfaces, while the PopSockets Grip is ideal for handheld shooting and quick angle changes.
Best Practices and Tips
- Use diffused natural light from a window whenever possible; place a white sheet or translucent diffuser between the window and the jewelry to soften shadows.
- Position the light source at a 45‑degree angle to the piece; this reduces direct reflections while preserving sparkle.
- Employ a neutral background such as matte black or white to prevent color casts and keep the focus on the jewelry.
- Stabilize the smartphone using one of the recommended stands; a stable platform eliminates motion blur and ensures consistent framing.
- Use the stylus pen to tap focus precisely on the most reflective facet; many smartphones allow manual focus lock by holding the focus point.
- Capture multiple exposures with varying exposure compensation; later combine them in post‑processing to retain detail in both highlights and shadows.
- Clean the jewelry and the phone lens before each shoot to avoid dust spots that become amplified under strong lighting.
Frequently Asked Questions
- Can I use the built‑in smartphone flash for jewelry?
- The built‑in flash creates a point source directly in front of the lens, which typically results in harsh glare and loss of detail. It is recommended to use diffused continuous lighting instead.
- Do I need a separate tripod for smartphone jewelry photography?
- A dedicated tripod is not mandatory if you employ a stable phone stand such as the Lamicall models. These stands provide the necessary height and angle control while keeping the device steady.
- How do I avoid reflections from the background?
- Use a non‑reflective matte background and position the light source so that it does not bounce off the surface onto the jewelry. A black velvet cloth works well for dark pieces, while a white paper works for light‑colored items.
- Is a stylus necessary for focusing?
- A stylus is not strictly required, but it offers greater precision when selecting the focus point, especially on small gemstones where a fingertip may cover the subject.
- Can I edit the photos on the smartphone itself?
- Yes, many mobile apps provide tools for adjusting exposure, white balance, and sharpness. However, capturing a well‑exposed image initially reduces the need for extensive post‑processing.
- What is the best way to store the suction mounts?
- Store the suction cups in a cool, dry place and avoid exposing them to dust. Clean them with a damp cloth before each use to maintain optimal adhesion.
Conclusion
Photographing reflective jewelry with a smartphone is achievable by mastering light direction, diffusion, and distance, and by employing accessories that provide stability and precision. The recommended stands, stylus pens, suction mounts, and grip solutions each address a specific challenge in the workflow, allowing creators to produce professional‑grade images without costly equipment. By applying the best‑practice tips and answering common questions, one can consistently capture the brilliance of jewelry pieces and share them with confidence.
Products Featured in This Guide
Lamicall 360° Rotating Phone Stand
Price: $8.99 | Rating: 4.8/5 (2,570 reviews)
Featured because its smooth 360° pivot and weighted base provide precise angle control and stability, essential for eliminating glare when photographing jewelry.
Universal Capacitive Stylus Pens (10‑Pack)
Price: $5.59 | Rating: 4.6/5 (9,359 reviews)
Featured because the ultra‑sensitive tips allow precise focus selection on small gemstones, improving sharpness without smudging the screen.
Lamicall Height‑Adjustable Foldable Phone Stand
Price: $9.99 | Rating: 4.8/5 (37,281 reviews)
Featured because its adjustable height and thick‑case compatibility enable overhead flat‑lay shots and ergonomic positioning for diverse jewelry pieces.
Yojaro Silicone Suction Phone Mounts (4‑Pack)
Price: $4.99 | Rating: 3.9/5 (520 reviews)
Featured because the suction cups create a stable, hands‑free platform for top‑down photography on smooth surfaces, reducing camera shake.
PopSockets Adhesive Phone Grip
Price: $9.94 | Rating: 4.6/5 (125,251 reviews)
Featured because its ergonomic grip and built‑in stand allow quick angle adjustments and comfortable handheld shooting for dynamic jewelry displays.